StackOverflow Reputation Points, How to gain it? .. & Why?

Not a single developer can live without using StackOverflow, almost daily πŸ™‚, but should you care about building your reputation points on it? .. and how?

What is Reputation?

As per the official StackOverflow description for the reputation

Reputation is a rough measurement of how much the community trusts you; it is earned by convincing your peers that you know what you’re talking about. The more reputation you earn, the more privileges you gain and the more tools you’ll have access to on the site – at the highest privilege levels, you’ll have access to many of the same tools available to the site moderators. That is intentional. We don’t run this site; the community does!

The Why part

Well, it is a reputation, which tells a lot about you, like:

  • How much the community trusts you
  • How you are willing to give the community back
  • Which specific set of technologies/frameworks are you interested in
  • Which specific tag you got most of your reputation in (which is probably the most important thing)
  • And even the way you communicate your thoughts in writing the answers, and how clear and concise are you

The How part

First let’s see what actions can give you the reputation points:

  • question is voted up: +10
  • answer is voted up: +10
  • answer is marked β€œaccepted”: +15 (+2 to acceptor)
  • suggested edit is accepted: +2 (up to +1000 total per user) (when you get the privilege of reviewing/accepting other edits, you won’t get these points anymore)
  • bounty related points (It is a rare thing, so let’s not focus on it)

but be careful, because you could also lose reputation when:

  • your question is voted down: βˆ’2
  • your answer is voted down: βˆ’2
  • you vote down an answer: βˆ’1
  • you place a bounty on a question: βˆ’ full bounty amount
  • one of your posts receives 6 spam or offensive flags: βˆ’100

Now concerning the strategy of getting the points, there are different types of people:

  • The Legends
  • The Moderator-like
  • The Lucky
  • The Addict
  • The Hustler
  • The Genuine (which is my way)

The Legends are reserved for people like Jon Skeet, who was the first to pass a One Million reputation points .. yes, you read it right .. one million πŸ™‚.

The Moderator-like characters are like the pillars for the whole community, they keep it organized, they review every report/flag in there, & they care about moderating StackOverflow way more than just getting the reputation points, although they get a lot of points too πŸ™‚.

The Lucky ones are the ones who got a ton of reputation on a simple questions like pupeno got 120k reputation from a single line question asking about the difference between “git fetch” & “git pull” .. yes that is it πŸ™ˆ.

The Addict character is the person who opens StackOverflow almost everyday, seeking new questions in the fields he know, hoping he would be the first one to answer, which would give his answer a better opportunity in getting accepted or getting more up-votes, he is basically addicted to getting more and more reputation everyday.
They can even go all the way, doing every activity mentioned in this paper “Building Reputation in StackOverflow: An Empirical Investigation” like:

  • answering questions related to tags with lower expertise density
  • answering questions promptly
  • being the first one to answer a question
  • being active during off peak hours
  • contributing to diverse areas

The Hustler is another addict character but his moral compass is not pointing north (If you know what I mean). This character will down vote rival answers no matter how better they are, just to give his answer the better exposure. The Character would also copy other answers with some slight modifications, just to get some up-votes out of it … Simply, Don’t be a Hustler.

The Genuine character, which is how I like doing things in an authentic way. For me this is the perfect balance between being passive (who doesn’t care about helping community) and being an addict (who wastes his/her own time contributing a lot in mostly an artificial way). For example, when I’m having a problem that I’m searching for its solution, I always keep an eye for all questions I find about this problem, specially the ones with poor answers or no answers at all, & when I find the perfect solution, here comes my time to add what I just found as an answer for all these related questions (whenever possible).
enter image description here
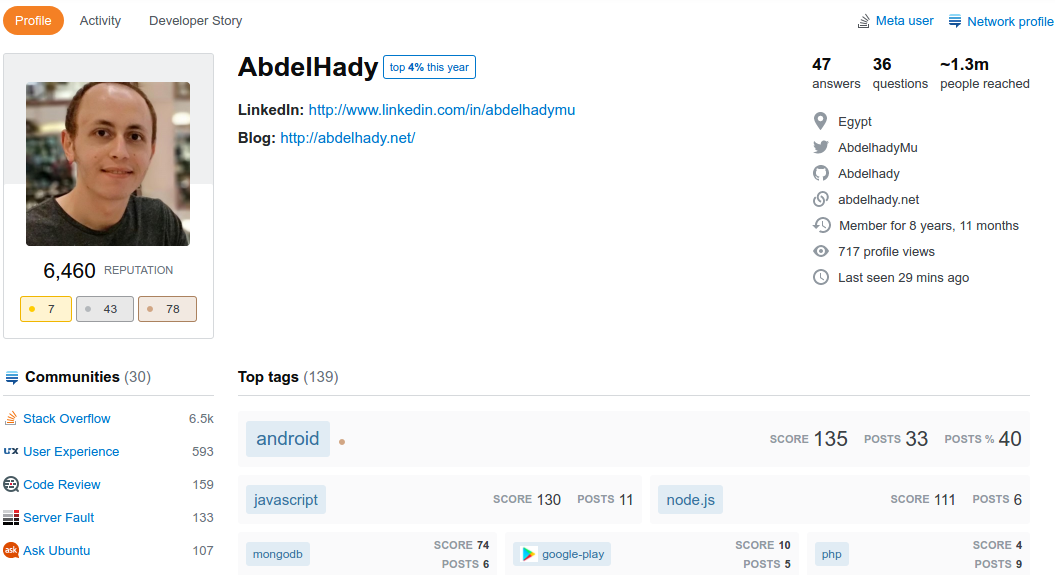
My genuine contributions led me to near 7K reputation points till now (2020), by just contributing when it is needed. The only problem with this approach is how to start, and how to be patient?!

My advice about how to start is as follows:

  • Don’t be afraid to write a question or an answer, this is the only way you can get started
  • Keep an eye on the badges section of your profile, because it is designed to let you track the badges that will help you familiarize yourself with the community & how contributions are being made, like the badge for making a certain number of up-votes, or the other one for up-voting questions more than answers and so on
  • Keep an eye for questions you searched for, but didn’t like their answers, no matter how old they are, and no matter how many answers they have already, just give your own answer that you think it is better than the others
  • Keep your questions/answers very clear, short and to the point, and use visual aids whenever possible
  • Familiarize your self with the Markdown language, which will help you write better questions/answers on StackOverflow, & even on Github

Examples:

  • I was making a chrome-extension where I needed to send a request to my server, it is easy to do it with jQuery’s $.ajax(), but it is not available inside the chrome-extension, so I searched for how to make the request with just vanilla Javascript and saw this question for “How to make an Ajax call without jQuery“. Question already has about 20 answers, with 2 of them exceeding 200 upvotes already, but non of the answers where helpful to me, answers where very long trying to be perfect, and some of them even tried to add the full html needed to make the call (I don’t know why on earth would they do that), So after I found a very concise way of sending the request, I made this answer and now it became the 4th up-voted answer in that question with 104 up-votes and counting 😎
  • I had a problem that my node server wasn’t logging the time for its error logs, I searched and reached this question about “How to add dates to pm2 error logs?” but the answer I found was a small one with no details whatsoever on how should this line work!
    The unhelpful answer
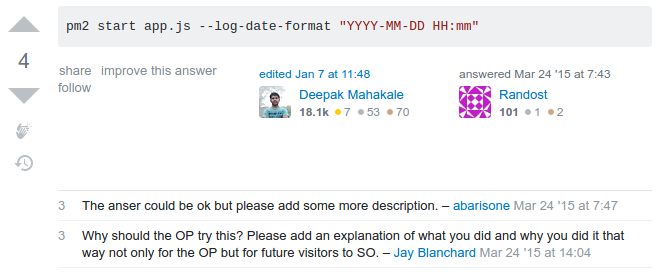
    so, I searched through the library’s github repo & started digging until I found the exact issue & the exact commit where the logging feature was added to the library, so I added my own answer so I can add the needed details:
    My final answer
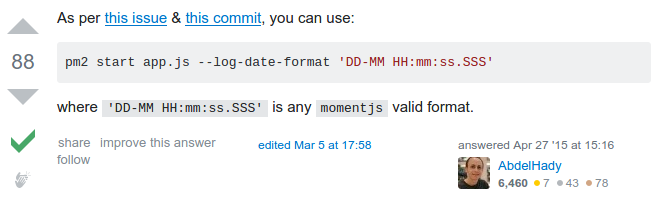
    and the answer not only got accepted, but got 88 up-votes till now and counting 😎

Conclusion

  • StackOverflow reputation is important for your career & personal branding.
  • Don’t be afraid to ask a question or write an answer
  • Be a Genuine contributor .. not a Hustler
  • Contribute to the community, & it will trust you with reputation points πŸ™‚

Uploading Extremely Large Files, The Awesome Easy Way [Tus Server]

Do you want your users to upload large files? .. I mean real large files, like multiple GB video .. Do your users live in places with a bad or unstable connection? .. If your answer is “yes”, then this article is exactly what you are looking for.

Background

At Chaino Social Network, we do care about our users, their feedback is our daily fuel, and a smooth enhanced UX is what we seek in everything we do for them. They asked for a video uploads feature, we made it for them .. they asked for a smaller processing time, we made it too .. they asked to upload a larger video files (up to 1 GB), again we made our precautions and increased the size to 1 GB .. but then we felt like hitting a wall, when we were swarmed by users’ feedback complaining that video uploads is easily interrupted by the bad networking, and the problem gets worse and worse when the files gets bigger and bigger where it becomes more vulnerable to interruptions and failures .. that is when we started our hunt for a solution. but let’s first see the current way of uploading.

Problem with normal way of Uploading

Our normal way of uploading is basically using the change event to start validating the file then uploading it as a multipart request where nginx does all the work for us then delivers the file path to our php backend where we can start processing the video, like the following:


$('#uploadBtn').change(function () {
var file = this.files[0];
if (typeof file === "undefined") {
return;
}
// some validations goes here using `file.size` & `file.type`
var myFormData = new FormData();
myFormData.append('videoFile', this.files[0]); // `videoFile` is the file name expected at the backend
$.ajax({
url: '/file/post',
type: 'POST',
processData: false,
contentType: false,
dataType: 'json',
data: myFormData,
xhr: function () { // Custom XMLHttpRequest
var myXhr = $.ajaxSettings.xhr();
if (myXhr.upload) { // Check if upload property exists
myXhr.upload.addEventListener('progress', handleProgressBar, false); // For handling the progress of the upload
}
return myXhr;
},
success: function(){
// Upload has been completed
}
});
});
function handleProgressBar(e) {
if (e.lengthComputable) {
// reflect values on your progress bar using `e.total` & `e.loaded`
}
}

view raw

app.js

hosted with ❤ by GitHub


<?php
class FileController {
public function postAction() {
// Disable views/layout the way suites your framework
if (!isset($_FILES['imageFile'])) {
// Throw an exception or handle it your way
}
// Nginx already did all the work for us, & received the file in the `/tmp` folder
$uploadedFile = $_FILES['imageFile'];
$OriginalFileName = $uploadedFile['name'];
$size = $uploadedFile['size'];
$completeFilePath = $uploadedFile['tmp_name'];
// Do some validations on file's type & file's size (using `$size` & `filesize($filePath)`
// & if all is fine, then start processing your file here, & probably return a success message
}
}

As you can see, both client & server sides expect the file to be sent in one shot no matter how big it is, but in the real world, networks get interrupted all the time, which forces the user to upload the file over & over again from the beginning! , which is super frustrating with large files like videos!

In our hunt for a solution, At first we found some honorable mentions like Resumable.js, they didn’t really introduce a complete solution because most of these solutions focus only on the client side, where the server side is actually the real challenge! but then we found the only real complete solution out there Tus.io which was beyond our dreams!

Solution .. The Awesome One

Now we need a solution who can make 2 things:

  • Protect our users from network interruptions, where the solution should be able to automatically retry sending the file until network is hopefully stable again.
  • Gives our users a resumable upload in case of total network failures; so after the network comes back, users can continue uploading the file again where they left off.

I know these requirements seem like a dream, but this is why Tus.io is so awesome in so many levels, simply this is how it works:
How tus.io can increase both speed and reliability of file uploads
(Illustration by Alexander Zaytsev)

Tus is being adopted & trusted by many products now like Vimeo.

Now, if we are going to cook this awesome meal, let’s first list our ingredients:

  • TusPHP for server side
    • We used php library, but actually you can use other server side implementations like node.js, Go or others
  • tus-js-client for client side
    • TusPHP already has a php client, but I think we all would agree to use the javascript implementations for the client over the php ones.

Getting Started
Let’s install TusPHP (for server-side) using composer:

composer require ankitpokhrel/tus-php

and installing tus-js-client (for client-side) using npm:

npm install tus-js-client

& here are the basic usage for them:


var tus = require("tus-js-client");
$('#uploadBtn').change(function () {
var file = this.files[0];
if (typeof file === "undefined") {
return;
}
// some validations goes here using `file.size` & `file.type`
var upload = new tus.Upload(file, {
// https://github.com/tus/tus-js-client#tusdefaultoptions
endpoint: "/tus",
retryDelays: [0, 1000, 3000, 5000, 10000],
metadata: {
filename: file.name,
filetype: file.type
},
onError: function (error) {
// Handle errors here
},
onProgress: function (bytesUploaded, bytesTotal) {
// Reflect values on your progress bar using `bytesTotal` & `bytesUploaded`
},
onSuccess: function () {
// Upload has been completed
}
});
// Start the upload
upload.start();
});

view raw

app.js

hosted with ❤ by GitHub


<?php
class TusController {
public function indexAction() {
// Disable views/layout the way suites your framework
$server = new TusPhp\Tus\Server(); // Using File Cache (over Redis) for simpler setup
$server->setApiPath('/tus/index') // tus server endpoint.
->setUploadDir('/tmp'); // uploads dir.
$response = $server->serve();
$response->send();
}
}

I tried this combination locally & everything worked like a charm. But then we deployed the solution to our Beta servers, and this is when the panic beginsπŸ™ˆ.

Production Shocks

I know we deployed on Beta servers only, but let’s face it, most of us expect Beta to be like 5 minutes away from deploying on production .. which wasn’t our case πŸ™‚. So, these are the problems we faced after using a real production-like environment:

Permission Denied for File Cache
Remember we used File Cache before for simplicity, well, the library expects you to pass a configuration for the cache file’s path or it will just make cache file inside the library’s folder in the vendor folder which gives us a Permission Denied error for trying to write to the vendor folder without the right permissions, so let’s just pass the right configuration with a path accessible by all server’s users like the /tmp folder (no need for keeping a long term cache, after all the cache won’t exceed 24 hours per file by design), and here is how you can do so:

TusPhp\Config::set([
    /**
     * File cache configs.
     *
     * Adding the cache in the '/tmp/' because it is the only place writable by
     * all users on the production server.
     */
    'file' => [
        'dir' => '/tmp/',
        'name' => 'tus_php.cache',
    ],
]);

HTTPS at the load-balancer
Locally I’m using a self-signed certificate, so all the traffic reaching the backend is totally Https, but on the production, the ssl is at the load balancer level, which redirects the traffic to our servers as Http only, which tricked Tus into believing that the video url is in Http only, which breaks the uploading, so I had to fix the response headers to add the Https back again:

// in the file controller before sending the response
// get/set headers the way that suits your framework
$location = $response->headers->get('location');
if (!empty($location)) {// `location` is sent to the client only the 1st time
    $location = preg_replace("/^http:/i", "https:", $location);
    $response->headers->set('location', $location);
}

PATCH is not supported
Yet, still not working, it turns out that our production environment setup doesn’t allow PATCH requests, and this is where tus-js-client came to the rescue with its option overridePatchMethod: true which depends on usual POST requests instead.

Re-Uploading starts from 0% !!
Now, everything works fine. On my local machine uploads was lightening fast, so I couldn’t actually test the resumability part of our solution, so let’s try it on the beta, let’s cancel the upload at 40% and try to re-upload it again .. Oh Ooh, it started from 0%, What the heck just happened!
After digging a lot in my server part (which was my suspect), it turns out that tus-js-client has an option called chunkSize with a default value of Infinity, which means upload the whole file at once πŸ™ˆ !!, so I just fixed it with specifying a chunk size of 1MB chunkSize: 1000 * 1000

Wrapping up the whole solution
After putting it all together, here is our final version:


var tus = require("tus-js-client");
$('#uploadBtn').change(function () {
var file = this.files[0];
if (typeof file === "undefined") {
return;
}
// some validations goes here using `file.size` & `file.type`
var upload = new tus.Upload(file, {
// https://github.com/tus/tus-js-client#tusdefaultoptions
endpoint: "/tus",
retryDelays: [0, 1000, 3000, 5000, 10000],
overridePatchMethod: true, // Because production-servers-setup doesn't support PATCH http requests
chunkSize: 1000 * 1000, // Bytes
metadata: {
filename: file.name,
filetype: file.type
},
onError: function (error) {
// Handle errors here
},
onProgress: function (bytesUploaded, bytesTotal) {
// Reflect values on your progress bar using `bytesTotal` & `bytesUploaded`
},
onSuccess: function () {
// Upload has been completed
}
});
// Start the upload
upload.start();
});

view raw

app.js

hosted with ❤ by GitHub


<?php
class TusController {
public function indexAction() {
// Disable views/layout the way suites your framework
$server = $this->_getTusServer();
$response = $server->serve();
$this->_fixNonSecureLocationHeader($response);
$response->send();
}
private function _getTusServer() {
TusPhp\Config::set([
/**
* File cache configs.
*
* Adding the cache in the '/tmp/' because it is the only place writable by
* all users on the production server.
*/
'file' => [
'dir' => '/tmp/',
'name' => 'tus_php.cache',
],
]);
$server = new TusPhp\Tus\Server(); // Using File Cache (over Redis) for simpler setup
$server->setApiPath('/tus/index') // tus server endpoint.
->setUploadDir('/tmp'); // uploads dir.
return $server;
}
/**
* The `location` header is where the client js library will upload the file through,
* But, the load-balancer takes the `https` request & passes it as
* `http` only to the servers, which is tricking Tus server,
* so, we have to change it back here.
*
* @param type $response
*/
private function _fixNonSecureLocationHeader(&$response) {
$location = $response->headers->get('location');
if (!empty($location)) {// `location` is sent to the client only the 1st time
$location = preg_replace("/^http:/i", "https:", $location);
$response->headers->set('location', $location);
}
}
}

Conclusion
Before Tus I always thought that uploading files has only one traditional way, and no one can touch it, to the extent that I felt that it is pointless even searching for a solution, but never stop at your own boundaries, break them & go beyond, and you will reach new destinations you never thought possible.
Now, uploading large files became dead simple, & I really want to thank the team behind Tus.io for what they did.

PHP: How to append Google Analytics’ campaign parameters to all your emails at once?

Using Google Analytics for tracking your users’ behavior is almost like using Air for breathing, then it comes its Custom Campaigns feature that will help you identify which of your marketing methods are more effective, or which campaigns emails gives you the better traffic, and so on.

But, how could I append the custom campaign url parameters to all my emails at once? .. Or what if I want to know which of my transactional emails (notifications, invitations … ) is better in retaining users, how could I append a parameter containing email template’s name to all links in the email? & how to do it in a smart way?

Answer #1 (the dumbest answer, but working!)
Just go through every single link in your email templates & append your campaign parameters or template’s name referral. Not only this will cost you time & effort, but also you will bang your head against the wall when you try to change it later!

Answer #2 (not recommended)
Be lazy & use Regex to process the final email’s html (just before sending) & append whatever you like to all the links in it. You can use the one from this answer, or even this one, or even come up with your own super enhanced regex to do the job, it is up to you.

Answer #3 (recommended)
Why reinvent the wheel by doing your own Regex while you can use an official Dom parser of your choice, since I’m using PHP, then it comes to the awesome DOMDocument class & its pretty effective loadHTML() function & here comes the awesomeness (thx to this answer by Wrikken which I edited after trying it for real):


<?php
/**
* appending campaign parameters to every single link `<a href=''></a>`
* in the given $bodyHtml
*
* @param type $bodyHtml
*/
public function appendCampaignPrameters($bodyHtml, $utmCampaign) {
$newParams = [
'utm_source' => 'email',
'utm_medium' => 'email',
'utm_campaign' => $utmCampaign
];
$doc = new \DOMDocument();
$internalErrors = libxml_use_internal_errors(true); //http://stackoverflow.com/a/10482622/905801
$doc->loadHTML($bodyHtml);
libxml_use_internal_errors($internalErrors);
foreach ($doc->getElementsByTagName('a') as $link) {
$url = parse_url($link->getAttribute('href'));
$gets = $newParams;
if (isset($url['query'])) {
$query = [];
parse_str($url['query'], $query);
$gets = array_merge($query, $newParams);
}
$newHref = '';
if (isset($url['scheme'])) {
$newHref .= $url['scheme'] . '://';
}
if (isset($url['host'])) {
$newHref .= $url['host'];
}
if (isset($url['port'])) {
$newHref .= ':' . $url['port'];
}
if (isset($url['path'])) {
$newHref .= $url['path'];
}
$newHref .= '?' . http_build_query($gets);
if (isset($url['fragment'])) {
$newHref .= '#' . $url['fragment'];
}
$link->setAttribute('href', $newHref);
}
return $doc->saveHTML();
}

Why Answer #3 is the recommended one?
Using a regex to parse only the links from the html’s string, seems a lot faster than parsing the whole dom elements, but does speed difference really matters when regex could give you incorrect results?! .. are you really willing to sacrifice speed for correctness?
I don’t really think so! .. In this, I’ll go with Gary Pendergast‘s opinion that we shouldn’t use Regex, but we should use the Dom parsing libraries which are well tested in terms of speed & correctness.

Hope you have found what you were looking for πŸ™‚ , & thx for sharing it with more people who may need it too.

Promises

Do you use callbacks only, or .. Promises too? πŸ˜‰

Amr Abdulrahman

Should IΒ read this?

If you’re a JavaScript developer who still uses callbacks (on either the client side or server side)Β then this post is for you. If you don’t know what Promises are, then you probably will find it useful.

Back in time, JavaScript was initially built to add interactivity to web pages and to be used on the client side. It has been designed to handle user interactions using events and event handlers. Also to make communications with the server. All of these stuff are AsynchronousΒ operations. we canΒ say:

JavaScript is an event-driven programming language.

which means, the flow of the program is determined by events such as user actions (mouse clicks, key presses) or messages from other programs/threads.

So?

So, JavaScript is designed over and encourages the usage of callbacks.

Here’s a simple illustration of how a callback way works. #Main script wants to execute #Function_BΒ after

View original post 323 more words

Android: Should you sign different Apps with the same Key or not?

Releasing your first App is a great milestone, but with releasing the second one, here comes the question: Should I use the same key to sign my new app, or should I generate a new key for it?!!

Well, it totally depends on your needs, so let’s see different needs:

Why using same key for different apps?

  • When you want to use App modularity features (as recommended by the official documentation):

    Android allows apps signed by the same certificate to run in the same process, if the applications so requests, so that the system treats them as a single application. In this way you can deploy your app in modules, and users can update each of the modules independently.

  • When you want to share Code/Data securely between your apps through permissions (also as recommended by the official documentation):

    Android provides signature-based permissions enforcement, so that an app can expose functionality to another app that is signed with a specified certificate. By signing multiple apps with the same certificate and using signature-based permissions checks, your apps can share code and data in a secure manner.

  • If you want to avoid the hassle of managing different keys for different apps.

Why using different keys for different apps?

  • If you are somehow paranoid about security (and you should), not to put all the eggs in one basket, which is highly recommended in this article.

  • When the apps are completely different & won’t ever use the app-modularity or Code/Data sharing described above.

  • When there is a chance (even a small one) that you will sell one of the apps separately in the future, then that app must have its own key from the beginning.

Some useful numbers:
As per this article, they made a study on August 2014, they found that Google Play has about 246,000 Android apps but only 11,681 certificates were found!
The distribution of the number of apps sharing the same key is shown below. The X-axis is the number of apps sharing the same certificate. The Y-axis is the number of certificates.
The distribution of the number of apps sharing the same key. The X-axis is the number of apps sharing the same certificate. The Y-axis is the number of certificates.

Be aware that once you signed your app and uploaded it to Google Play, you can’t undo this step, you can’t sign it with a different certificate key. so make your decision wisely!

I hope you find here the answer you were searching for, & hope you share your case with us in the comments .. Good Luck πŸ™‚

Querying MongoDB ObjectId by Date range

I had a situation where I wanted to query a collection in the production environment for a specific day, but the surprise for me was that the collection has no CreatedAt field in it in the first place :), so I had to rely on the ObjectId of the document. Searching around for a while I found this answer by kate, so I wanted to share it with all of you, & even shared it as an answer on another StackOverflow question.

And here it goes, let’s assume we want to query for April 4th 2015, we can do it in the terminal like this:

> var objIdMin = ObjectId(Math.floor((new Date('2015/4/4'))/1000).toString(16) + "0000000000000000")
> var objIdMax = ObjectId(Math.floor((new Date('2015/4/5'))/1000).toString(16) + "0000000000000000")
> db.collection.find({_id:{$gt: objIdMin, $lt: objIdMax}}).pretty()

Android: Loading images Super-Fast like WhatsApp – Part 2

We discussed earlier in Part 1 of this tutorial how Zingoo team wants to deliver the best UX possible to the users, & because WhatsApp is doing a great job with images, so we watched what they are doing, like:

  • Photos are cached, so no need to load them every time you open the app.
  • They first show a very small thumbnail (about 10KB or less) until the real image is loaded, & this is the real pro-tip for their better UX.
  • Photos sizes range around 100KB, which loads the images pretty fast on most common mobile-network speeds.

First 2 points are already discussed in part 1, so question here in part 2 is how could we compress images to be about 100KB to be sent easily over common mobile-networks.

How is it done?
After taking the picture and saving it to a file with path imagePath, we start compressing it to be ready for sending over network:

ImageCompressionAsyncTask imageCompression = new ImageCompressionAsyncTask() {
    @Override
    protected void onPostExecute(byte[] imageBytes) {
        // image here is compressed & ready to be sent to the server
    }
};
imageCompression.execute(imagePath);// imagePath as a string

& here is what we do in ImageCompressionAsyncTask:

public abstract class ImageCompressionAsyncTask extends AsyncTask<String, Void, byte[]> {

    @Override
    protected byte[] doInBackground(String... strings) {
        if(strings.length == 0 || strings[0] == null)
            return null;
        return ImageUtils.compressImage(strings[0]);
    }

    protected abstract void onPostExecute(byte[] imageBytes) ;
}

It is clear that the real juice exists in ImageUtils.compressImage(). Thanks to Ambalika Saha & her brilliant post that enabled me from using this solution in Zingoo, and even writing this post right here πŸ™‚ . And here is my version of doing it:

public class ImageUtils {
    private static final float maxHeight = 1280.0f;
    private static final float maxWidth = 1280.0f;

    public static byte[] compressImage(String imagePath) {
        Bitmap scaledBitmap = null;

        BitmapFactory.Options options = new BitmapFactory.Options();
        options.inJustDecodeBounds = true;
        Bitmap bmp = BitmapFactory.decodeFile(imagePath, options);

        int actualHeight = options.outHeight;
        int actualWidth = options.outWidth;
        float imgRatio = (float) actualWidth / (float) actualHeight;
        float maxRatio = maxWidth / maxHeight;

        if (actualHeight > maxHeight || actualWidth > maxWidth) {
            if (imgRatio < maxRatio) {
                imgRatio = maxHeight / actualHeight;
                actualWidth = (int) (imgRatio * actualWidth);
                actualHeight = (int) maxHeight;
            } else if (imgRatio > maxRatio) {
                imgRatio = maxWidth / actualWidth;
                actualHeight = (int) (imgRatio * actualHeight);
                actualWidth = (int) maxWidth;
            } else {
                actualHeight = (int) maxHeight;
                actualWidth = (int) maxWidth;

            }
        }

        options.inSampleSize = ImageUtils.calculateInSampleSize(options, actualWidth, actualHeight);
        options.inJustDecodeBounds = false;
        options.inDither = false;
        options.inPurgeable = true;
        options.inInputShareable = true;
        options.inTempStorage = new byte[16 * 1024];

        try {
            bmp = BitmapFactory.decodeFile(imagePath, options);
        } catch (OutOfMemoryError exception) {
            exception.printStackTrace();

        }
        try {
            scaledBitmap = Bitmap.createBitmap(actualWidth, actualHeight, Bitmap.Config.ARGB_8888);
        } catch (OutOfMemoryError exception) {
            exception.printStackTrace();
        }

        float ratioX = actualWidth / (float) options.outWidth;
        float ratioY = actualHeight / (float) options.outHeight;
        float middleX = actualWidth / 2.0f;
        float middleY = actualHeight / 2.0f;

        Matrix scaleMatrix = new Matrix();
        scaleMatrix.setScale(ratioX, ratioY, middleX, middleY);

        Canvas canvas = new Canvas(scaledBitmap);
        canvas.setMatrix(scaleMatrix);
        canvas.drawBitmap(bmp, middleX - bmp.getWidth() / 2, middleY - bmp.getHeight() / 2, new Paint(Paint.FILTER_BITMAP_FLAG));

        ExifInterface exif;
        try {
            exif = new ExifInterface(imagePath);
            int orientation = exif.getAttributeInt(ExifInterface.TAG_ORIENTATION, 0);
            Matrix matrix = new Matrix();
            if (orientation == 6) {
                matrix.postRotate(90);
            } else if (orientation == 3) {
                matrix.postRotate(180);
            } else if (orientation == 8) {
                matrix.postRotate(270);
            }
            scaledBitmap = Bitmap.createBitmap(scaledBitmap, 0, 0, scaledBitmap.getWidth(), scaledBitmap.getHeight(), matrix, true);
        } catch (IOException e) {
            e.printStackTrace();
        }
        ByteArrayOutputStream out = new ByteArrayOutputStream();
        scaledBitmap.compress(Bitmap.CompressFormat.JPEG, 85, out);
        return out.toByteArray();
    }

    public static int calculateInSampleSize(BitmapFactory.Options options, int reqWidth, int reqHeight) {
        final int height = options.outHeight;
        final int width = options.outWidth;
        int inSampleSize = 1;

        if (height > reqHeight || width > reqWidth) {
            final int heightRatio = Math.round((float) height / (float) reqHeight);
            final int widthRatio = Math.round((float) width / (float) reqWidth);
            inSampleSize = heightRatio < widthRatio ? heightRatio : widthRatio;
        }
        final float totalPixels = width * height;
        final float totalReqPixelsCap = reqWidth * reqHeight * 2;

        while (totalPixels / (inSampleSize * inSampleSize) > totalReqPixelsCap) {
            inSampleSize++;
        }

        return inSampleSize;
    }
}

I hope you like it.

Android: Loading images Super-Fast like WhatsApp – Part 1

Zingoo is a new promising app that will rock your weekends, outings and any happening that you want to easily enjoy watching its moments over & over again (we are now doing the Android version, then the iOS one). Because we want Zingoo to be born strong, it has to deliver the best possible [UX] to all awesome-moments lovers around the world, which means we have to do our best in loading the images.

Because we (at Begether) do listen to our users, we heard a lot of comments on how WhatsApp is loading images super-fast, so we dug deeper to know what we can do about it, & here is what we find,

What does WhatsApp do?
WhatsApp is doing the following (numbers are approximate):

  • Photos sizes range around 100KB, which loads the images pretty fast on most common mobile-network speeds. (part 2 explains how to achieve this)
  • Photos are cached, so no need to load them every time you open the app (almost no need to mention this πŸ™‚ ).
  • They first show a very small thumbnail (about 10KB or less) until the real image is loaded, & this is the real pro-tip for their better UX.

The last tip has a different variance by calculating the image dimensions & the approximate color of the image that will be shown & applying it to its placeholder, like the coming 3 minutes in this video:

but still, the thumbnail is away more cooler, right? πŸ˜‰

How is it done?
To achieve the caching there are some good Android libraries out there that are doing a good job, but one of them is doing a way better than the others, which is Picasso. Both caching on disk & on memory are built under the hood, with a very developer-friendly API, I just love what Jake Wharton & his mates did for all of us, thanks guys.
Using Picasso is pretty easy, just like this example one-liner:

Picasso.with(context).load("http://i.imgur.com/DvpvklR.png").into(imageView);

you just need first to add Picasso to your gradle files with the urlConnection library (according to this issue), like this:

compile 'com.squareup.picasso:picasso:2.4.0'
compile 'com.squareup.okhttp:okhttp-urlconnection:2.0.0'

After solving the caching issue, we need to apply the thumbnail great tip, we need to use Picasso 2 times, one for loading the thumbnail and the other for loading the real image like the comment I made on this issue. Also to avoid the thumbnail’s pixlation effect (due to its small size), it would be better to make a blurring effect on it,
WhatsApp's Thumbnail Loading Effect

and here is how it is done:

Transformation blurTransformation = new Transformation() {
    @Override
    public Bitmap transform(Bitmap source) {
        Bitmap blurred = Blur.fastblur(LiveImageView.this.context, source, 10);
        source.recycle();
        return blurred;
    }

    @Override
    public String key() {
        return "blur()";
    }
};

Picasso.with(context)
    .load(thumbUrl) // thumbnail url goes here
    .placeholder(R.drawable.placeholder)
    .resize(imageViewWidth, imageViewHeight)
    .transform(blurTransformation)
    .into(imageView, new Callback() {
        @Override
        public void onSuccess() {
            Picasso.with(context)
                    .load(url) // image url goes here
                    .resize(imageViewWidth, imageViewHeight)
                    .placeholder(imageView.getDrawable())
                    .into(imageView);
        }

        @Override
        public void onError() {
        }
    });

We used the Callback() functionality to start loading the full image after the thumbnail is completely loaded, with using the blurred thumbnail’s drawable as the new placeholder for the real image, & this is how the magic is being done right here :).
Also the blurring made here is Blur.fastblur(), thanks to Michael Evans & his EtsyBlurExample example, you can find this class here.

The only remaining part is how to compress the large images (which could be 2 to 4 MB) to be only about 100 KB, which is discussed in Part 2.

All Node.js frameworks in one page

Do you wanna use Node.js but don’t know which framework that suits your needs ?

well, this page has all available frameworks known today categorized by:

So, this is all you need to start choosing the framework that suits your needs, good luck.

Tip: look for how many github stars the framework has got, it shows you how much it is trusted by people like you πŸ˜‰ , which brings us to the incredible record by Meteor which is 22,337 stars till now!!

Solved: Restarting node server may stop recurring Agenda jobs

Node is the future, it is that simple. With that being said, one of the important things one will look for is how to start cron-jobs, is it by just using cron-tab to start a stand-alone script, or could it be a plugin inside the code base itself, like what is available in Node with its great npm set of packages that you can choose from,
one of the very good packages for managing the cron-jobs is Agenda which comes with a great feature for visualizing your jobs by using Agenda-UI which looks like this:
enter image description here

Problem
After starting using Agenda (0.6.27), I faced a serious issue when restarting my node server, because the recurring jobs (i.e agenda.every '30 minutes') may stop working for no reason, my code was like this:

agenda.start()
agenda.define 'my job', my_job_function
agenda.every '30 minutes', 'my job'

for a while, I thought in leaving Agenda for good, & using the widely known Cron instead, which is a really great alternative by the way, it is almost an imitation of the linux’s cron-tab interface, with an incredible number of downloads (95,483 downloads in the last month),
The only thing kept me trying to find a solution is Agenda’s superior advantage by monitoring the jobs easily using its Agenda-UI interface, so I opened an issue on Agenda’s github page & digged in a little more until I found the solution.

Solution 1
Since redefining our jobs on server start didn’t solve it, so I managed to remove the old broken recurring jobs when shutting down the server like this (you can add the following to your startup scripts like putting it in app.js):

graceful = ()->
    agenda.cancel repeatInterval: { $exists: true, $ne: null }, (err, numRemoved)->
        agenda.stop ()->
            process.exit 0

and with server start, the jobs will be redefined again & voila,
I’m using this workaround now, & it is working like a charm.

Solution 2
While observing the broken jobs & what causes them to stop working, I found that they are locked, because restarting the server while they are still running prevented them from releasing the lock, so droppedoncaprica has proposed the following solution to release all locks when starting the server:

agenda._db.update {lockedAt: {$exists: true } }, { $set : { lockedAt : null } }, (e, numUnlocked)->
    if e
        console.log e
    console.log "Unlocked #{numUnlocked} jobs."
    # redefine your jobs here

Once Agenda solves this issue, I’ll update the post with the version containing the fix isA.